Saturday, November 2, 2013

Hey everyone sorry I haven't written for like... 2 months but never fear I am back! So here is a recipe for y'all. Have fun!


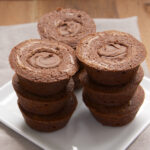
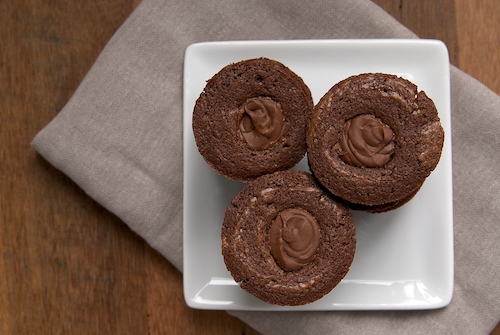
Chocolate Hazelnut Brownie Cups
Prep Time: 20 minutes
Cook Time: 24 minutes
Yield: 24 mini brownies
Chocolate Hazelnut Brownie Cups
Ingredients
  • 1/2 cup unsalted butter
  • 1 ounce unsweetened chocolate, finely chopped
  • 1 cup granulated sugar
  • 1/4 cup unsweetened cocoa powder
  • 2 large eggs, lightly beaten
  • 1 teaspoon vanilla extract
  • 1/2 teaspoon salt
  • 3/4 cup all-purpose flour
  • about 1/2 cup Nutella
Instructions
Preheat oven to 350°. Generously grease 24 mini-muffin cups.
Place butter in a microwave-safe bowl and heat to melt. Add chopped chocolate.
Stir until chocolate has melted and mixture is smooth. Transfer mixture to a large mixing bowl.
Add sugar and cocoa powder to butter/chocolate mixture. Stir until combined. Add eggs, vanilla, and salt, mixing until combined. Stir in flour, mixing just until combined and smooth.
Transfer batter to prepared muffin cups, filling each cup about 3/4 full. Smooth the top of the batter with a small spatula or spoon.
Place Nutella in a zip-top bag and press into a corner. Cut the corner off the bag. Place the cut opening of the bag just slightly into the top center of brownie batter. Squeeze bag gently to add about a teaspoonful of Nutella into each brownie.
Bake 20-24 minutes, or until a pick inserted into the brownie comes out with moist crumbs.

Cool on wire rack about 10 minutes. Using a small knife or spatula, gently loosen brownies from pan. Remove brownies to a wire rack to cool completely.

Monday, September 30, 2013

Here is a recipe that is sure to brighten you mood as we go in to October. Pumpkin Pie Cookies.
Mini Pumpkin Pie Slice Cookies Close Up
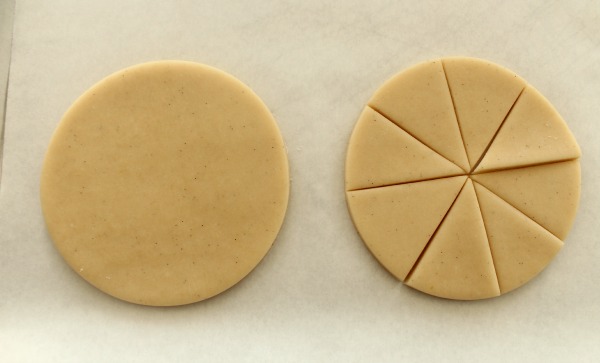
To make mini-pie slices use a knife to cut simple circles into wedges.  The size of the cookies will depend on what size cutter you use.
Mini Pumpkin Pie Cookies
When it comes to circle cutters I love graduated sets because I always have the size I need.  If you have a mini-candy corn cutter, that would work too.
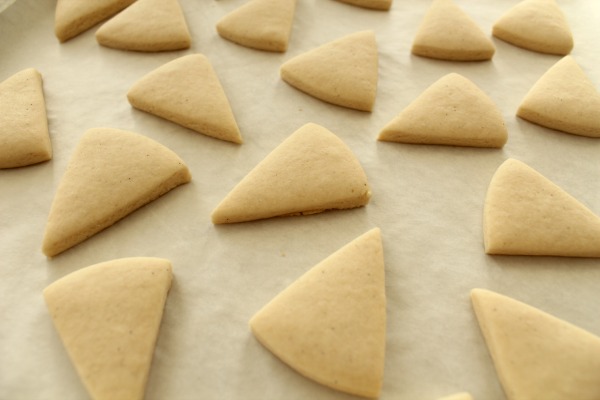
I used a four inch round cutter so the baked cookies were about two inches in length.
Mini-Pumpkin Pie Slice Cookies
To make these cookies you will need:
  • Pumpkin orange 20-second icing
  • Stiff-ish crust colored piping icing {I mixed ivory with a little warm brown}
  • Stiff white piping icing
Begin by flooding the wedges with orange 20-second icing and let dry.
Mini-Pumpkin Pie Slice Cookies 2
To make the crust, position a #101 tip near the left corner of the cookie, thin side up.  Slowly move up and down in a loose “M” shape until you reach the opposite side.
Mini pie slice cookies SweetSugarBelle
Use a boo-boo stick or toothpick to clean up any sharp points if necessary.  If you’re new to petal tips, don’t let them intimidate you.  Practice on a paper towel until you feel confident.
Decorated Pumpkin Pie cookies
Finish up by using a star tip to add a dollop of whipped cream.  I used a #16, but an #18 would work well too.
Mini-Pie Slice Cookies for Thanksgiving
Including the crust my mini pie cookies were just a little over two inches long.
Mini Pumpkin Pie Cookie 4
Use these cuties to fill Mason jars for an adorable gift.
Mini Pumpkin Pie Slice Cookies
Happy Cooking!

Saturday, September 14, 2013

Hi everyone I am going to be doing something a little different today. I will be doing a post about me! So this is a little about me.. 

  1. I love to read.
  2. I play the violin.
  3. I like taking horseback riding lessons.
  4. I love to play softball.
  5. I really like to write and blog.
  6. I get distracted easily.
  7. I play howrse.
  8. I love hockey.
  9. I have a web show.
  10. And last... I love crafts and recipes and sharing them.  

So alas I could not make a blog post about me without posting one of my favorite recipes. So here tis one of my favorite recipes ever!


classic lemon cheesecake
  • 1 cup (150g) plain (all-purpose) flour
  • ¼ cup (55g) caster (superfine) sugar
  • 100g unsalted butter, chopped
filling
  • 330g cream cheese, softened
  • 500g ricotta
  • 4 eggs
  • 1⅓ cups (295g) caster (superfine) sugar
  • ¼ cup (60ml) lemon juice
  • 2 tablespoons finely grated lemon rind
  • ½ teaspoon vanilla extract
  • 1½ tablespoons cornflour (cornstarch)
  • 1½ tablespoons water
  • 1 cup (250ml) single (pouring) cream, whipped
Preheat oven to 150°C (300°F). Place the flour, sugar and butter in a bowl and rub with your fingertips to form a rough dough. Using the back of a spoon, press the mixture into the base of a lightly greased 20cm round springform tin lined with non-stick baking paper. Bake the base for 30 minutes or until golden and just cooked. Set aside. To make the filling, place the cream cheese, ricotta, eggs, sugar, lemon juice and rind, and vanilla in a food processor and process until smooth. Place the cornflour and water in bowl and mix until smooth. Add the cornflour mixture to the cheese mixture and mix to combine. Pour over the cooked base and bake for 1 hour and 10 minutes or until light golden and just set. Turn the oven off and allow to cool in the oven with the door closed. Refrigerate for 1 hour or until cold. Top with the cream to serve. Serves 8–10.

Hope you enjoy this cake just as much as I do and see you next time when we will be looking at a fall craft. (I was supposed to do that this post, see how distracted I get)
BYE!

Saturday, September 7, 2013

Hello people and welcome back how are you??? Well I'm good. It is that time of year when things get a little cooler so you just want to be warm. I am here to give you some recipes and other little things that will make fall fun. This week I will post a recipe a craft and maybe another surprise. This is Fall week.

Here we go with some pumpkin cheesecake muffins. 


Pumpkin Muffin

1- 15 oz can pumpkin
1/4 cup canola oil
2 jumbo eggs
1 cup dark brown sugar
1 tsp vanilla
1-1/2 cups whole wheat flour
1 tsp baking powder
1/2 tsp baking soda
1/2 tsp cinnamon
1/2 tsp ground ginger
1/2 tsp nutmeg
1/8 tsp ground cloves
1/2 tsp salt
1/4 tsp freshly ground black pepper

Filling

8 oz cream cheese at room temperature
1 jumbo egg yolk
5 tbsp sugar
1/2 tsp vanilla extract

Preheat oven to 350 degrees.

Mix pumpkin, oil and sugar together on low.  Add in eggs and vanilla and mix in.  Mix dry ingredients into wet ingredients.  Combine thoroughly and scrape the sides of the bowl until well combined.

Make the filling:

Mix together cream cheese, sugar, egg yolk and vanilla until combined.

Assemble:

Line your muffin tins with paper cups (or grease your muffin tins if you don't want to use paper cups).  Drop in spoonfuls of pumpkin mixture to fill about 1/2 way.  Add smaller spoonfuls of cream cheese mixture to top to fill the cup to about 3/4 full.  Use a skewer or spoon handle to swirl.

Bake:

Mini muffins:  20-25 minutes
Standard muffins:  25-30 minutes
Jumbo muffins:  30-40 minutes
Hope you enjoyed and I will see you next time with another post.

Friday, August 23, 2013

Hey sorry I haven't written in a while but I have been SUPER busy so here is a new craft that I hope you will enjoy!


Here’s what you’ll need:
1. Measure the height and circumference of your jar, and cut strips of fabric to roughly fit (approx. 1cm wide – doesn’t have to be perfect).
2. In your small cup, pour in some glue and dilute it with a bit of water (about 1:2), mix well. It should be the consistency of slightly thicker water.. yes, I know I’m being vague but it shouldn’t make much difference to the end result.
3. Submerge your first strip of fabric in the glue. Once soaked, lightly run your thumb and forefinger down the strip to get rid of any excess glue.
4. Place the strip into your jar (pattern side facing the jar) and position it. Use your paintbrush to push any air bubbles out from between the fabric and the jar.
5. Repeat with the rest of your fabric. Allow to dry overnight before using.
Note:
- It would be best to use battery operated tea lights instead of real candles
- I find that it’s ok to have fabric going above the top of your jar because it can be easily cut off after it’s dried.
- I don’t mind the look of the overlapping lines of fabric once the candle is lit, but if you do try not to overlap the strips in the gluing process.
** I’m just going to add this little disclaimer… please use only battery operated tea-lights(not real candles). If you do decide to go with real candles, you do so at your own risk. Make sure your jar is big enough that the candle has plenty of room around it (the bigger the better), with no chance of the flame touching the fabric. Make sure the glue is dried overnight before using the votives, and keep an eye on them – if you see any signs of them starting to burn, stop using them immediately! **

Sunday, July 28, 2013

Hey everyone how are you doing. So today I am going to do something different. It is a recipe but it is not edible. It is.... Dog Shampoo! Here it is.

  DIY Natural Dog Shampoo | www.gimmesomestyleblog.com
 What you need for DIY Natural Dog Shampoo: 
DIY Natural Dog Shampoo | www.gimmesomestyleblog.com
What you’ll do to make your homemade dog shampoo: 
  • Starting with the dish soap pour the ingredients into your jarDIY Natural Dog Shampoo | www.gimmesomestyleblog.comDIY Natural Dog Shampoo | www.gimmesomestyleblog.comDIY Natural Dog Shampoo | www.gimmesomestyleblog.com
  • Shake the jar to mix the ingredients together.DIY natural dog shampoo | www.gimmesomestyleblog.com

    DIY Natural Dog Shampoo

    April 2, 2013
    DIY Natural Dog Shampoo | www.gimmesomestyleblog.com
    This post for DIY Natural Dog Shampoo contains affiliate links.
    How was everyone’s Easter? We had such a great day spending time at one of our favorite churches, eating and hanging out with our family and loving the BEAUTIFUL weather! It could not have been a prettier day! Everyone seemed to be having such a great time. Except our dog Veda… she still may have been holding a grudge against me.
    Our dog hates having baths. It is one of her least favorite past times. Knowing that she would be spending time with family over Easter I knew she needed a bath. We ran out of shampoo after her last bath so I decided just to make my own DIY natural dog shampoo! I have seen many different recipes floating around the interweb, but I ran across this one and thought I’d give it a try!  
    DIY Natural Dog Shampoo | www.gimmesomestyleblog.com
    What you need for DIY Natural Dog Shampoo: 
    DIY Natural Dog Shampoo | www.gimmesomestyleblog.com
    What you’ll do to make your homemade dog shampoo: 
    • Starting with the dish soap pour the ingredients into your jar
    DIY Natural Dog Shampoo | www.gimmesomestyleblog.comDIY Natural Dog Shampoo | www.gimmesomestyleblog.comDIY Natural Dog Shampoo | www.gimmesomestyleblog.com
    • Shake the jar to mix the ingredients together.
    DIY natural dog shampoo | www.gimmesomestyleblog.com
    • Thoroughly wet your dog down with water and pour the shampoo onto your pet.
    • Lather the shampoo into your pet’s fur.
    • Rinse!

    DIY Natural Dog Shampoo | www.gimmesomestyleblog.com
    DIY Natural Dog Shampoo | www.gimmesomestyleblog.com
    Thanks for reading. I'll see you later. Bye!

Saturday, June 29, 2013

Sorry I haven't been posting I was on vacation but to make up for that I have a super cool recipe for you. Here it is!

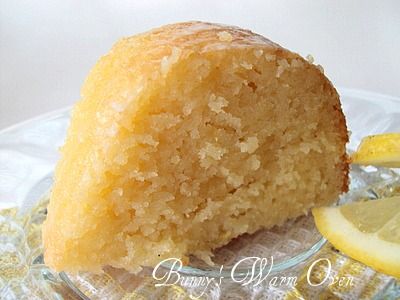
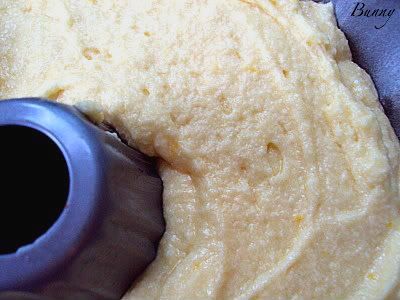
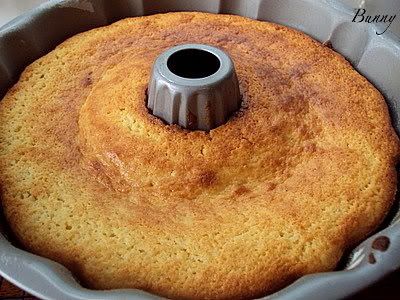
Glazed Lemon Ricotta Cake

 photo DSC01407-2_zps74524dc8.jpg

Photobucket

Photobucket

Lemon Glazed Ricotta Cake
Ricotta Cake:
1 ½ sticks unsalted butter, softened
15 ounces whole milk ricotta
1 ½ cups sugar
3 eggs
1 teaspoon vanilla
Zest and Juice of 1 large lemon
1 ½ cup all purpose flour
2 ½ teaspoons baking powder
½ teaspoon baking soda
1 teaspoon salt
Lemon Glaze:
2 cups powdered sugar
3 tablespoons fresh lemon juice
Preheat oven to 350 degrees. Butter and flour a Bundt cake pan and set aside.
In a large mixer bowl, cream together the butter and sugar until well combined. Add the ricotta and blend until light and fluffy, about 5 minutes. Mix in the eggs one at a time, incorporating well. Add the vanilla, lemon juice/zest and mix until fully combined.
Sift together the flour, baking powder, soda, and salt. Add the dry ingredients in 2 increments, mixing just until incorporated. Pour into the prepared pan and smooth our as needed. Bake 35-40 minutes, or until the cake is set and a toothpick inserted comes out clean.
Let cool in the pan for at least 15 minutes before turning out onto a wire rack. Whisk together the powdered sugar and lemon juice until smooth. Drizzle the lemon glaze over the top of the cake and serve.

Monday, June 24, 2013

Hi we are back with an awesome recipe that will be sure to light up your party! This time it is not a dessert but it is still very good.

Turkey Cucumber Roll Ups
Peeled Cucumber Slices (using a vegetable peeler, take off cucumber skin, then continue to peel the cucumber around the seeded middle)
3 slices of real, unprocessed deli meat (I used turkey)
Half a tomato, diced
Shredded carrot
Shredded lettuce
Paleo mayo (optional)
Toothpicks


20120604-142150.jpg

 20120604-142252.jpg

20120604-142325.jpg

Add your vegetables in a thin line. If you want to add paleo mayo, add it now.

20120604-142444.jpg

Lift up the edge of the cutting board or parchment paper to help you fold the roll onto itself.

20120604-142603.jpg

Roll tightly.

20120604-142630.jpg

Insert a toothpick in the center of each cucumber slice.

20120604-142709.jpg

Using a paring knife or a serrated knife, slice between each cucumber slice. Serve and enjoy!!

20120604-142803.jpg

Hope you liked. See you tomorrow. Bye!

Sunday, June 23, 2013

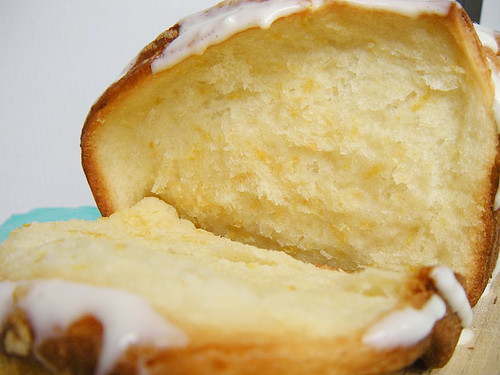
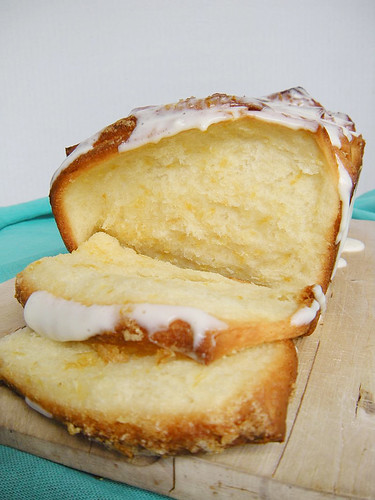
Hi Hi! Tea week is back with a great recipe to try sunday afternoon. Here is... Lemon pull apart bread. Enjoy!

Picture 004 copy

Picture 013 copy

This bread takes a bit of time to make and seems lengthy in steps but there is nothing difficult about making this bread at all. And your reward will be soft, pillow-y layers of lemon scented, sugar crusted, delicious bread. I followed the recipe as-is and it was perfect. You can make an orange, grapefruit, or even cinnamon-sugar version of it. But no matter which flavor you choose… make it and promise me you’ll try the layer-by-layer method of eating it.
Picture 015 copy

Ingredients:
For the sweet yeast dough:
About 2 3/4 cups (12 1/4 ounces) all-purpose flour
1/4 cup (1 3/4 ounces) granulated sugar
2 1/4 teaspoons (1 envelope) instant yeast
1/2 teaspoon salt
1/3 cup (2 1/2 fluid ounces) whole milk
2 ounces unsalted butter
1/4 cup (2 fluid ounces) water
1 1/2 teaspoons pure vanilla extract
2 large eggs , at room temperature
For the lemon paste filling:
1/2 cup (3 1/2 ounces) granulated sugar
3 tablespoons finely grated lemon zest (3 lemons)
1 tablespoon finely grated orange zest
2 ounces unsalted butter , melted
For the tangy cream cheese icing:
3 ounces cream cheese , softened
1/3 cup (1 1/4 ounces) powdered sugar
1 tablespoon whole milk
1 tablespoon fresh lemon juice
1/4 teaspoon lemon extract
Directions:
Note: for process photos of some of the trickier steps, head on over to myPumpkin Spice Pull-Apart Bread post. Same process, different delicious flavor.
1. Stir together 2 cups (9 ounces) of the flour, the sugar, the yeast, and the salt in the bowl of a stand mixer; set aside. In a small saucepan, heat the milk and butter over low heat just until the butter is melted. Remove from the heat, add the water, and set aside until warm (120 to 130°F [49 to 54°C]), about 1 minute. Add the vanilla extract.
2. Pour the milk mixture over the flour-yeast mixture and, using a rubber spatula, mix until the dry ingredients are evenly moistened. Attach the bowl to the mixer, and fit the mixer with the paddle attachment. With the mixer on low speed, add the eggs, one at a time, mixing after each addition just until incorporated. Stop the mixer, add 1/2 cup (2 1/4 ounces) of the remaining flour, and resume mixing on low speed until the dough is smooth, 30 to 45 seconds. Add 2 more tablespoons flour and mix on medium speed until the dough is smooth, soft, and slightly sticky, about 45 seconds.
3. Sprinkle a work surface with 1 tablespoon flour and center the dough on the flour. Knead gently until smooth and no longer sticky, about 1 minute, adding an additional 1 to 2 tablespoons flour only if necessary to lessen the stickiness. Place the dough in a large bowl, cover the bowl securely with plastic wrap, and let the dough rise in a warm place (about 70°F [21°C]) until doubled in size, 45 to 60 minutes. Press the dough gently with a fingertip. If the indentation remains, the dough is ready for the next step. While the dough is rising, make the filling.
Make the lemon paste filling
4. In a small bowl, mix together the sugar and the lemon and orange zests. Set the sandy-wet mixture nearby (the sugar draws out moisture from the zests to create the consistency).
Make the coffee cake
5. Center a rack in the oven and preheat the oven to 350°F (175°C). Lightly butter a 9-by-5-by-3-inch loaf pan. Or, lightly coat the pan with nonstick spray.
6. Gently deflate the dough. On a lightly floured work surface, roll out the dough into a 20-by-12-inch rectangle. Using a pastry brush spread the melted butter generously over the dough. Cut the dough crosswise into 5 strips, each about 12 by 4 inches. (A pizza cutter is helpful here.) Sprinkle 1 1/2 tablespoons of the zest-sugar mixture over one of the buttered rectangles. Top with a second rectangle and sprinkle it with 1 1/2 tablespoons of the zest-sugar mixture. Repeat with the remaining dough rectangles and zest-sugar mixture, ending with a stack of 5 rectangles. Work carefully when adding the crumbly zest filling, or it will fall off when you have to lift the stacked pastry later.
7. Slice the stack crosswise through the 5 layers to create 6 equal strips, each about 4 by 2 inches. Fit these layered strips into the prepared loaf pan, cut edges up and side by side. (While there is plenty of space on either side of the 6 strips widthwise in the pan, fitting the strips lengthwise is tight. But that’s fine because the spaces between the dough and the sides of the pan fill in during baking.) Loosely cover the pan with plastic wrap and let the dough rise in a warm place (70 °F [21°C]) until puffy and almost doubled in size, 30 to 50 minutes. Press the dough gently with a fingertip. If the indentation remains, the dough is ready for baking.
8. Bake the coffee cake until the top is golden brown, 30 to 35 minutes. Transfer to a wire rack and let cool in the pan for 10 to 15 minutes.
Make the tangy cream cheese icing
9. In a medium bowl, using a rubber spatula, vigorously mix the cream cheese and sugar until smooth. Beat in the milk and lemon juice until the mixture is creamy and smooth.
10. To remove the coffee cake from the pan, tilt and rotate the pan while gently tapping it on a counter to release the cake sides. Invert a wire rack on top of the coffee cake, invert the cake onto the rack, and carefully lift off the pan. Invert another rack on top, invert the cake so it is right side up, and remove the original rack.
11. Slip a sheet of waxed paper under the rack to catch any drips from the icing. Using a pastry brush, coat the top of the warm cake with the icing to glaze it.
12. Serve the coffee cake warm or at room temperature. To serve, you can pull apart the layers, or you can cut the cake into 1-inch-thick slices on a slight diagonal with a long, serrated knife. If you decide to cut the cake, don’t attempt to cut it until it is almost completely cool.
Picture 017 copy

Saturday, June 22, 2013

Hi welcome back to tea week. Today we will be making Mini Cheesecakes!

Image

Ingredients: 2 (8oz) cream cheese, softened
2 eggs
1 cup sugar
1 tsp. vanilla extract
1 tbsp. lemon juice
Nilla wafer crackers
Pie filling (I like blueberry, strawberry, & raspberry, but you can use whatever you like best!)
cupcake liners
 
Directions: Mix cream cheese, sugar, one egg, lemon juice and vanilla extract, until smooth. Then, add second egg.
Place one Nilla cracker in each cupcake liner. Pour 1-2 tablespoons batter into each liner.
Bake for 20 minutes at 300°F. Refrigerate for 2 hours or over night then add pie filling on top. Makes 18-20 cupcakes.
You can tweak it anyway you like.

Hope you enjoy this recipe! Bye!

Friday, June 21, 2013

Today we are making Lemon Tea Cookies. I made these and they turned out really good. Enjoy!

Lemon Tea Cookies
Lemon Tea Cookies
for the cookies
¾ cup (1 1/2 sticks) unsalted butter
1 teaspoon lemon zest
1 tablespoon lemon juice
1 ¼ cup flour
½ cup cornstarch
1/3 cup confectioners’ sugar
for the frosting
¾ cup confectioners’ sugar, sifted
¼ cup unsalted cold butter, cut into 1/2 inch cubes
1 teaspoon lemon zest
1 teaspoon lemon juice
for the cookies
Cream butter, lemon zest and juice until fluffy. In separate bowl, sift dry ingredients and mix into butter on low speed.
Divide in half. Shape each half into an 8×1 inch log and roll in plastic wrap. Refrigerate for 2 hours.
Cut into ¼ inch rounds. Bake at 350 F for 12 minutes. Cool and frost.
for the frosting
On low speed, mix the cold butter with electric mixer (use paddle attachment for a stand mixer) until smooth. Slowly add confectioners’ sugar until blended. Beat in the lemon zest and juice.

Tomorrow we will look at one of my favorite recipes... Mini Cheesecake.